When Should I Replace My Computer?

The question of when to retire a computer is a subjective one at best.  It depends on many things.  However, there are some basic rules of thumb you can use to help make the decision easier.

The first question to ask yourself when considering computer replacement is, “why do I want to replace my computer?”  The answer to this question will be very helpful in deciding if it’s a good idea.

If your “why” is that you’re just tired of your old one and want something new, then by all means, indulge yourself.  In this article I’m not addressing the question of affordability or if your spouse thinks it’s a good idea.  You’ll have to decide those issues for yourself.  The purpose of this article is to address the technical aspects of the decision.

If your “why” is that the old one doesn’t perform up to snuff or won’t run some of you programs, that’s a different story.  Then you need to look at some other things before making your decision.

Very often, a computer’s performance problems are caused by things we can easily correct.  If your hard drive is too full, you can clean it up.  If too many programs are running at once, you can control which ones start and which ones don’t.  The performance settings can also be tweaked to best fit the kind of work you do.  I won’t go into how to do any of that here.  I do however go into quite a bit of detail about it in my free  “How to Turbo-Charge Your Computer” video e-course.   You can get instant access to that course by clicking here.

If you’ve tuned up your computer and that hasn’t helped, there may still be a thing or two you can do before purchasing a new one.

One of the most common things to do is reload the operating system.  This is not usually necessary on Macs (but sometimes it is!).  It definitely applies to Windows computers though.   The older your version of Windows, the more you will probably gain by doing this.

Windows XP especially benefits from an occasional reload.  I like to compare Windows XP to the old Pac Man game.  You remember…the one where the little yellow chomping faces eat up everything in their path.  Well, that’s how Windows acts too.

Each time you start up Windows XP, the longer you go before restarting, the more the system performance degrades.  It’s like the little Pac Men eat up more and more pieces of your system until it won’t run anymore and needs to restart.  The problem is, it’s like that in the long run too.  The more months and years you go without reloading, the more your system degrades.

So the question becomes, do you want to reload and have an OLD computer that works like it did when it was new?  Or do you want a new computer that runs like new and will do so for a few years?

The most I’ve ever gotten out of a Windows XP installation was about 5 years.  Admittedly, I probably run my computers far harder than most people do.  If all you do is browse the internet and read email, yours may last much longer.

I knew it was time to reload when I could only start up QuickBooks one time.  If I closed it and tried again, it would not start without restarting the computer.  Also, if I wanted to change printer settings, it took nearly 10 minutes for the dialog box to come up.  Normally, it should come up instantly.

I figured out that Windows was the problem and not the hardware with a novel test process that cost me nothing.  I just reinstalled Windows on a new partition of my hard drive.  Since it was on the very same hardware, the only difference was that the installation was new.  It worked beautifully…just like new!

However, even though this worked, I decided to replace the computer anyway.  As I said earlier, there are many reasons for replacing a computer.  In this case, I didn’t want to go to all the trouble of reloading all my programs (many, many programs!) and still be on the same ancient hardware and operating system.  This process takes over a day and I’d much rather have sometime more modern to show for my work.

On the other hand, if you have an abundance of time and don’t wish to spend the money on a new computer, you may want to give this a try.  It’s quite easy to do.

Just back up your data to a USB drive and make sure you have installable copies of any programs you want to keep.  You also will need a copy of Windows.  You don’t necessarily need YOUR copy of Windows.  As long as you record your license number before erasing everything, just about any copy of Windows will do.  Just make sure it’s the same version of Windows as your license number is for.  The one exception I’ve run into is if you have a copy of Windows that was made for a specific computer.  Sometimes it will only allow installation on the computer it was made for.

Many computers have a recovery drive on them.  If yours does, it should have a recovery program on it too.  This program, when started, gives you the opportunity to change your computer back to the exact state as when it was new.  You’ll be amazed at how well your old computer will work after you do this.  Just like new!

If you have no copy of Windows and no recovery drive, you can often use a friend’s copy.  You can also buy a copy on Craigslist or EBay without a license number since you already have your own.   I recently purchased a copy of Vista this way for around $5.  This is perfectly legal and can be installed as many times as you like as long as you have a unique serial/license number for each computer you put it on.

If you commonly use software that is upgraded regularly, you may not want to do this.  As I said, you end up with an old computer that runs like it did when it was new.  That may not be adequate if you’re trying to run software that was written years after that computer became out of date.  That’s one reason I generally build a new computer instead of reloading Windows after years of use.

Just remember to tune up your computer before you make any decision to replace it.  Not doing so is like selling your car because it needs an oil change or a tune up.  Of course your car will run poorly if not maintained!  The same goes for your computer.

So grab a copy of my free video e-course and make it run like new again.  You should see significant improvements in speed, less locking up (or none), and no more blue screens of death.  You’ll be able to spend your time on those important, fun things in life instead of constantly waiting for your computer to respond.

It will make your computer fun again and your computer will love you for it!

If you still don’t’ like your old computer after going through the course (and maybe reloading Windows), at least you’ll know that you did everything you could to get the best from it.  You’ll also have the immense satisfaction of not having to pay anyone to check out an old computer!  You can go shopping with a clear conscious and have fun finding a new computer!

If you enjoyed this article, please click the Facebook “like” button at the top left of this page.  Feel free to share it with your friends too.  If you have questions, please add them to the bottom of this page.  I try to answer all your questions as soon as I can.

By the way, as an added bonus, if you get the free video e-course I mentioned, you’ll also get free access to our e-zine that’s packed with other tips and tricks to simplify your life!

Thanks for visiting and I look forward to seeing you back here soon!


About Robert Seth

Robert Seth is a CPA in the Clark County, Washington area who has been serving individual and small business clients for the last 25 years. His business includes a growing number of remotely serviced customers throughout the United States. He’s also a writer and technology expert. He has a passion for improving the lives of others by helping them simplify the complicated stuff in their lives.
How to Fix or Tune up a CD or DVD Drive and Maintain it in Top Condition

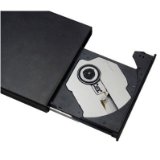
CD and DVD drives are high precision devices that need occasional maintenance to stay in top shape.  In this article we talk about how they work and what to do to keep yours at its best.

Have you ever slipped a CD or DVD into your computer or DVR drive only to get lots of noise but no action?  I’m pretty sure this has happened to most of us.  When it does happen it’s easy to assume the drive is broken.  This is often not the case though.  The problem is usually that the drive is just dirty. It takes a surprisingly small amount of dirt to cripple a CD or DVD drive.  Before we look at how to clean one, let’s take a look at why it’s so easy to mess one up in the first place.

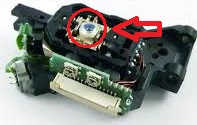
The photo on top is of a typical CD/DVD drive reading mechanism.  The critical part that we’re concerned about is the little blue object inside the red circle.  This is a tiny lens.  The penny on the bottom is provided for a size comparison.

A laser beam is used to read the information on the disk.  The beam is reflected off the disk and then passes through this lens when the drive is reading information.  The lens is supposed to keep the beam in focus at all times by varying the distance between the disk surface and itself.

This laser beam and the information it must read are very small.  Let me give you an idea of just how small.  The data on a DVD is arranged in a spiral shaped track.  The track has approximately 50,000 complete turns and is almost 39,000 feet long!

In order to fit that long of a track on a disk, the width of the track is only .4 microns.  A micron is really, really small!  A human hair is about 25 microns.  That means it would take about 62 tracks to equal the width of a human hair.  So you can see (actually you can’t because it’s so small) how small all this stuff is.

With the information on the disk being so tiny, the laser has to be controlled and focused very precisely.  That’s where our dust and dirt comes in.  It only takes a little bit of dust on the lens, in just the right place, to get in the way of the beam.  This causes it to become out of focus making it much more difficult to read the information correctly.

If it becomes too out of focus, it will not be able to read the disk at all.  The drive will just spin and make noise as it tries every way it can to read the data.  So if your drive is working poorly, or not at all, there’s a good chance that it’s only dirty and not really broken. 

Let’s look at a couple of different ways to clean the dust off and bring your drive to practically new condition.

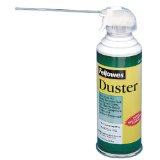
The first method is fairly simple and straightforward.  It’s also pleasantly inexpensive.  It involves nothing more than a can of compressed air!


The little straw attached to the nozzle of these cans is perfect for getting into tight places.  If your drive is a drawer type, make sure it’s open when you clean it.  If it’s the kind that sucks the disk in through a slot, just insert the straw a little ways into the slot.  Make sure there is no disk in the drive before doing this.

Move the straw back and forth, and in and out, as you press the trigger to blow in the air.  Do this fairly quickly as the liquid in the can will soon become quite cold and lose its pressure.  If this happens, you will need to let the can warm up again before continuing.

Be very careful to keep the can upright.  If you turn it sideways or upside down you can blow pure liquid coolant into the drive or get it on yourself.  This is not good for the computer or you.  The liquid is usually carbon dioxide and is cold enough to cause instant frostbite.  It can also cause electronic parts to malfunction or crack if their temperature goes from warm to freezing in an instant.  

I find that this method works very well most of the time.  How well it works for you will depend on how dirty the lens has  become.  Sometimes there’s just too much dirt to blow it all away.  After using this method try playing a CD or DVD to see if the problem has been fixed.

If the blower method does not work, you can try the cleaner-disk method.  A cleaner disk looks like a regular disk except it has little microfiber brushes on it that stick straight up off the surface of the disk.  They look like a bunch of tiny little eyelashes.

Memorex CD/DVD-Player Laser-Lens Cleaner


(For more information, or to purchase this item, click on the image).

As the disk turns in the drive, these little brushes hit the lens surface and clean the dust off.  Kind of like when you use a feather duster to dust the stuff in your house.  Cleaner disks sometimes come with a little tube of cleaner that helps remove the dust and also neutralizes static so dust does not stick so easily.

To use the disk, simply insert it into the drive and follow the instructions on the screen.  Even if your drive won’t read a disk, the brushes will begin to clean the lens as soon as the drive begins to spin.  It may take a few minutes, but eventually the instructions should come up on the screen. 

There will usually be several different cleaning cycles to choose from.  In addition to instructions, it may also have music for you to enjoy while the disk is doing it’s job.  The computer will tell you when the cleaning is done.  Just remove the disk and hopefully your drive will be good as new.

In all the years I’ve been working on computers, I have rarely seen these two methods fail. Disk drives do wear out occasionally but not very often.  It’s usually the ones inside hard-core gaming machines that fail on a regular basis.  Regular business and home machines are more likely to fail from dust buildup because of disuse than from wearing out.

I have had many drives that I’ve moved from machine to machine as I’ve rebuilt them every couple of years.  Usually if they are retired it’s because more advanced technology becomes available.  Not because they break.

If these two methods don’t work, try checking the cables inside the computer.  One of them may be loose.

Another thing to try before assuming the drive is dead is rebooting the computer.

Lastly, it’s possible that the disk you’re trying to use might be damaged.  Try several different disks before giving up and replacing the drive. 

If you do find that one of your disks is scratched, check this article that I wrote on removing scratches for an inexpensive and very easy way to repair it.  This repair will only work for scratches though.  If the disk is cracked, warped, or otherwise seriously damaged, it will need to be replaced.


There is one other thing I should mention here.  There are other high precision parts inside a CD/DVD drive beside the lens.  Another place that dust and dirt can cause a problem is in the tracking mechanism which moves the lens across the disk.  This tracking mechanism is more robust than the lens so it can take more dirt and abuse before it fails.

The two things that will cause it to fail are a very large buildup of dust, or extreme physical abuse.  If too much dust is allowed to build up, it can get packed into various places inside the drive.  This can prevent the reading mechanism from being able to move to either the extreme beginning or ending point on the disk.

In cases like this, even though there is nothing really wrong with the drive, it is not usually financially practical to fix.  It involves removing the drive, disassembling it, and removing the obstructing dust buildup.  If you have a professional do this for you it will probably cost more than a new drive.

If you are a do-it-yourself type though you might want to give it a try.  All you have to lose is an already dead drive.  It’s also a great learning experience so you can see what’s involved for yourself.  Besides, you might actually fix it and not need to spend the money for a new one after all.

The moral of the story is to maintain your equipment.  It’s a good idea to get a can of air and a cleaner disk and use them once a week or so.  By keeping the dust cleaned out on a regular basis, your drives should last many years and possibly longer than the computer. 

If you have enjoyed this article please click the “like” button.  Also consider joining me on Facebook by clicking the “like” button in the “Find us on Facebook” box in the left sidebar.

Now it’s your turn.  If you have something to add or know of other good tips for keeping drives in top condition, I’d love to hear from you.  Please leave a comment so everyone can benefit.

Thanks for visiting!


Robert Seth is a CPA in the Clark County, Washington area who has been serving individual and small business clients for the last 25 years.  His business includes a growing number of remotely serviced customers throughout the United States. He’s also a writer and technology expert.  He has a passion for improving the lives of others by helping them simplify the complicated stuff in their lives. 


Unraveling the Mysteries of Computer Backups

Are you a little fuzzy on the best way to back up your computer?  Do the different types of backups have you scratching your head and wondering what it all means?

Well sit back, relax, and let’s have a little chat about that.  This subject has gotten a bit confusing in the last few years.  This is especially true as technology has advanced and things like virtual machines have come along to further confuse the issue.  We’ll discuss virtual machines in a moment.

Backups can be of two different types.  The first is what’s called an actual backup.  It generally only contains data.  For example, if you have a word processor on your computer, a backup would only contain your documents, not the word processor itself or the operating system.

When using this type of backup, if you have a catastrophic failure on your computer and your hard drive is unusable, a lot of reinstalling is required.  First the operating system (like Windows), then your programs (like your word processor), and then your backup to get your data back.  This can be a time consuming process even if you can find all your software quickly!

The second type of backup is not really a backup by definition.  It’s really an image.  An image is like a photograph of your hard drive at a point in time.  It contains everything!  It has your operating system, programs, data files, settings, etc.

In the event of a catastrophic failure, an image can be restored to a new computer and it will look and run just like the old one.  There is no need to reinstall anything.  This is far more convenient than a backup and saves a great deal of time.  There is no need to locate and install all your software or spend time adjusting settings.

Another cool thing about an image is that it’s not required to copy it to a new computer in order to use it.    You simply click on it from another computer and it’s ready to use.

This is called mounting the image and is commonly referred to as a virtual machine.  It’s a complete computer running in the memory (virtually) of another computer.  Programs can be run, data and files added and updated, documents printed, etc.  It is truly the most convenient method available for protecting the information on your computer.

In order to run an image as a virtual machine though, your computers processor must support this feature.  It is called virtualization technology and is available in most modern processors.  If you plan to use this feature make sure your computer can support it before investing in the necessary software.  Speaking of software, to run an image as a virtual machine it’s generally required that you have the same software installed as was used to create the image.

There are also backups that you might call hybrids of these two types.  For example, the system restore function in Microsoft Windows is a type of image.  However, it cannot be restored to another computer or run as a virtual machine.  It only restores the same computer to a different point in time.  It also is not absolutely dependable and should not be the only thing you rely on for your backups.

Time Machine on Apple computers is an image type backup.  It can restore your original computer, or a replacement, to the exact condition of the old one.  The image cannot be used as a virtual machine though.

Acronis True Image Home, or other similar programs, are examples of complete image systems.  Once an image is made, it is completely portable and can be mounted or restored to another computer.

The other distinction made when talking about backups relates to where they’re stored.  They can be on your computer, on an external drive, on a network, or offsite.  There are advantages and disadvantages to each of these locations.

Storing on the same computer you’re backing up is the least secure.   This is especially true if it’s on the same drive as the one being backed up.

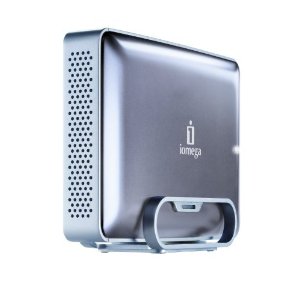
An external drive is more secure.  If stored onsite, it can be restored very quickly.  It is also not dependent on whether or not your internet connection is working.  The disadvantage to onsite is that it can be destroyed or stolen along with the computer that was back up which has the effect of no backup at all.

Offsite is more secure but less convenient.  In the case of a physical backup, like a hard drive, you have to go and get it to restore it.  If the backup is online it can take hours (or days) to upload or download depending on the speed of your internet connection. If a catastrophic event takes out your internet connection, it could be very difficult and take a long time to get your computer restored.  If using a backup system that relies on a third party, this adds another variable to the equation.  If the third party system crashes, you also lose your backup.

So now you know the basics of backups.  This should be enough information to help you decide which system you want to use.  It should also help you understand the one you may already be using.

If this article was helpful to you, or if you have questions about your backup system or one you are considering, please leave a comment and I’ll get right back to you.  If you liked the article, please click the “like” button. Also feel free to join me on Facebook at http://fb.com/complicatedtosimple. You can easily do this by clicking the “like” button in the “find us on facebook” box to the upper left of this article.

Thanks for visiting and I hope to see you back soon!

How to go Paperless on a Budget

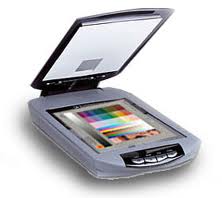
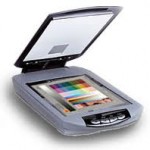
Flatbed ScannerThis is another one of those questions I get asked about a lot.  It’s usually not a direct question though.  It usually comes up when I mention to one of my clients that I need to scan this or that document to my server.  I also tell them that I prefer email to faxes because emails can be directly stored on the server without being scanned. I then get a sort of puzzled look, like they would like to ask a question but they’re not quite sure what to say.

I proceed to explain that a few years ago I went almost completely paperless in my office.  I say almost because I have not yet scanned all the old stuff in my filing cabinets.  However, since going paperless, there have been virtually no documents added to my files.  Everything gets scanned and returned to the client.  Emails get stored directly, and faxes get scanned and shredded.

After explaining this I usually get a look of awe and wonder followed by a comment that goes something like, “isn’t that really hard to do?” Or, “I thought about doing that but had no idea how.”  The other day I got another one of these reactions and it got me thinking.  Based on the number of these reactions, there must be a lot of people out there that would like to paperless but don’t know how. 

I’ve been a CPA in my own practice for about 25 years.  I’m always on the lookout for new technology that will improve efficiency.  Quite a few years ago I started working on the idea of a paperless office.  This was long before it was in vogue to be green and there was very little information available about it.  The first technology to appear was aimed at professionals. It was quite expensive and very proprietary.  It was common to pay over $10,000 for a scanner and proprietary software.  This also tended to lock you into a specific vendor.  You were at their mercy for upgrade charges and you prayed they would not go out of business.

Fortunately those days are over!  Now it’s very simple to set up your own paperless system. It’s feasible and affordable for both businesses and individuals.  There are still lots of companies out there that would like you to believe it’s expensive and impossible to set up yourself.  They offer expensive document-management packages that automate the whole task.  Some of these products do have their place.  Some are for specialized industries or large user groups that have unique security or other needs.  For those types of users, the do-it-yourself system may not be appropriate.  For the rest of us though, there are some simple and inexpensive tools out there that will have you paperless in no time.

The first thing you will need is a scanner.  This is especially true if you will be archiving all your existing documents.  Even if you’re not archiving though, it’s still pretty difficult to get everything in electronic format in the first place.   There will always be that odd scrap of paper that you don’t want to physically keep track of.  What kind of scanner to get is a big question but I think I can narrow down the essentials quickly.  Your will need either a flatbed or sheet-feed scanner, or one that does both.  Sheet-feed will only do sheets of paper that are large enough to be fed through it.  Small receipts and other miscellaneous will require a flatbed.  Also make sure you match your expected usage with the duty cycle (scans per month rating) of the machine.  If you have mountains of paperwork, you will need an industrial strength scanner to match.  Most other features that you can choose from-and there are many-are more a matter of preference.

The only other thing you need is software.  I use Adobe Acrobat Professional but there are various others available.  Whatever you decide to use, make sure it saves your documents in the Adobe PDF format.  Pretty much the entire world uses this format so you will always be able to share documents and you’ll never be stuck with something your computer can’t read. 

Lastly, make sure your software and hardware will talk to each other.  This is not as big an issue with scanners connected directly to a computer.  However, if you want the scanner available to network users, you’ll need to do your homework to make sure everything will work together.

Whether you’re working on a PC or Mac, you already have a document-management system.  It’s your operating system which would be Windows or Mac OS.  You simply create a folder on your computer and scan your documents directly to it. You can also scan to your desktop and then save to your desired location.  The beauty of this system is that it’s completely customizable and free. 

In my office I have a folder on my server called “Archived Client Files.”  Each client has their own subfolder and some subfolders have subfolders of their own if the client has many different document types.  For example I might have folders for payroll tax reports, personal and business tax returns, electronic filing confirmations, and anything else that might need a folder.  I also have folders for Firm documents like licenses and paid bills, and directories for various personal categories.  This is just one of many ways it could be done.  You are only limited by your imagination! So your paperless document system is simply made up of folders and subfolders somewhere on your computer or on an external storage device.

One other tip I would like to mention.  If you have the space for your old paper files and you don’t have a deadline for archiving, you can choose the lazy way of going paperless.  Start doing everything paperless now so no new papers gets added to your files.  After you have retained each file you already have for the required period of time, just shred it.  This is the method I’m using for some of my old files.  I go through my files once a year and shred anything I no longer need to keep.  Some files are permanent so I will end up archiving those.  Another nice thing about electronic archiving is that you can keep more things that you might have otherwise tossed out because of limited physical space.

I realize this has been a basic overview of this subject and there are lots more things that could be said on this subject. If you want to know more, or have suggestions for additional post, sign up in the box on the right and leave a comment.  Depending on how many requests I have, there’s a very good chance I will write a completely customized post directed at just your question. 

Thanks for visiting!