CD and DVD drives are high precision devices that need occasional maintenance to stay in top shape. In this article we talk about how they work and what to do to keep yours at its best.

Have you ever slipped a CD or DVD into your computer or DVR drive only to get lots of noise but no action? I’m pretty sure this has happened to most of us. When it does happen it’s easy to assume the drive is broken. This is often not the case though. The problem is usually that the drive is just dirty. It takes a surprisingly small amount of dirt to cripple a CD or DVD drive. Before we look at how to clean one, let’s take a look at why it’s so easy to mess one up in the first place.


The photo on top is of a typical CD/DVD drive reading mechanism. The critical part that we’re concerned about is the little blue object inside the red circle. This is a tiny lens. The penny on the bottom is provided for a size comparison.
A laser beam is used to read the information on the disk. The beam is reflected off the disk and then passes through this lens when the drive is reading information. The lens is supposed to keep the beam in focus at all times by varying the distance between the disk surface and itself.
This laser beam and the information it must read are very small. Let me give you an idea of just how small. The data on a DVD is arranged in a spiral shaped track. The track has approximately 50,000 complete turns and is almost 39,000 feet long!
In order to fit that long of a track on a disk, the width of the track is only .4 microns. A micron is really, really small! A human hair is about 25 microns. That means it would take about 62 tracks to equal the width of a human hair. So you can see (actually you can’t because it’s so small) how small all this stuff is.
With the information on the disk being so tiny, the laser has to be controlled and focused very precisely. That’s where our dust and dirt comes in. It only takes a little bit of dust on the lens, in just the right place, to get in the way of the beam. This causes it to become out of focus making it much more difficult to read the information correctly.
If it becomes too out of focus, it will not be able to read the disk at all. The drive will just spin and make noise as it tries every way it can to read the data. So if your drive is working poorly, or not at all, there’s a good chance that it’s only dirty and not really broken.
Let’s look at a couple of different ways to clean the dust off and bring your drive to practically new condition.
The first method is fairly simple and straightforward. It’s also pleasantly inexpensive. It involves nothing more than a can of compressed air!

The little straw attached to the nozzle of these cans is perfect for getting into tight places. If your drive is a drawer type, make sure it’s open when you clean it. If it’s the kind that sucks the disk in through a slot, just insert the straw a little ways into the slot. Make sure there is no disk in the drive before doing this.
Move the straw back and forth, and in and out, as you press the trigger to blow in the air. Do this fairly quickly as the liquid in the can will soon become quite cold and lose its pressure. If this happens, you will need to let the can warm up again before continuing.
Be very careful to keep the can upright. If you turn it sideways or upside down you can blow pure liquid coolant into the drive or get it on yourself. This is not good for the computer or you. The liquid is usually carbon dioxide and is cold enough to cause instant frostbite. It can also cause electronic parts to malfunction or crack if their temperature goes from warm to freezing in an instant.
I find that this method works very well most of the time. How well it works for you will depend on how dirty the lens has become. Sometimes there’s just too much dirt to blow it all away. After using this method try playing a CD or DVD to see if the problem has been fixed.
If the blower method does not work, you can try the cleaner-disk method. A cleaner disk looks like a regular disk except it has little microfiber brushes on it that stick straight up off the surface of the disk. They look like a bunch of tiny little eyelashes.
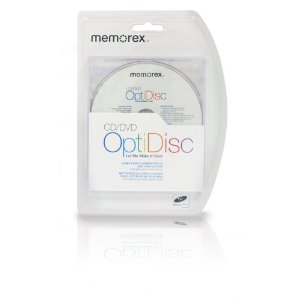
Memorex CD/DVD-Player Laser-Lens Cleaner

(For more information, or to purchase this item, click on the image).
As the disk turns in the drive, these little brushes hit the lens surface and clean the dust off. Kind of like when you use a feather duster to dust the stuff in your house. Cleaner disks sometimes come with a little tube of cleaner that helps remove the dust and also neutralizes static so dust does not stick so easily.
To use the disk, simply insert it into the drive and follow the instructions on the screen. Even if your drive won’t read a disk, the brushes will begin to clean the lens as soon as the drive begins to spin. It may take a few minutes, but eventually the instructions should come up on the screen.
There will usually be several different cleaning cycles to choose from. In addition to instructions, it may also have music for you to enjoy while the disk is doing it’s job. The computer will tell you when the cleaning is done. Just remove the disk and hopefully your drive will be good as new.
In all the years I’ve been working on computers, I have rarely seen these two methods fail. Disk drives do wear out occasionally but not very often. It’s usually the ones inside hard-core gaming machines that fail on a regular basis. Regular business and home machines are more likely to fail from dust buildup because of disuse than from wearing out.
I have had many drives that I’ve moved from machine to machine as I’ve rebuilt them every couple of years. Usually if they are retired it’s because more advanced technology becomes available. Not because they break.
If these two methods don’t work, try checking the cables inside the computer. One of them may be loose.
Another thing to try before assuming the drive is dead is rebooting the computer.
Lastly, it’s possible that the disk you’re trying to use might be damaged. Try several different disks before giving up and replacing the drive.
If you do find that one of your disks is scratched, check this article that I wrote on removing scratches for an inexpensive and very easy way to repair it. This repair will only work for scratches though. If the disk is cracked, warped, or otherwise seriously damaged, it will need to be replaced.
There is one other thing I should mention here. There are other high precision parts inside a CD/DVD drive beside the lens. Another place that dust and dirt can cause a problem is in the tracking mechanism which moves the lens across the disk. This tracking mechanism is more robust than the lens so it can take more dirt and abuse before it fails.
The two things that will cause it to fail are a very large buildup of dust, or extreme physical abuse. If too much dust is allowed to build up, it can get packed into various places inside the drive. This can prevent the reading mechanism from being able to move to either the extreme beginning or ending point on the disk.
In cases like this, even though there is nothing really wrong with the drive, it is not usually financially practical to fix. It involves removing the drive, disassembling it, and removing the obstructing dust buildup. If you have a professional do this for you it will probably cost more than a new drive.
If you are a do-it-yourself type though you might want to give it a try. All you have to lose is an already dead drive. It’s also a great learning experience so you can see what’s involved for yourself. Besides, you might actually fix it and not need to spend the money for a new one after all.
The moral of the story is to maintain your equipment. It’s a good idea to get a can of air and a cleaner disk and use them once a week or so. By keeping the dust cleaned out on a regular basis, your drives should last many years and possibly longer than the computer.
If you have enjoyed this article please click the “like” button. Also consider joining me on Facebook by clicking the “like” button in the “Find us on Facebook” box in the left sidebar.
Now it’s your turn. If you have something to add or know of other good tips for keeping drives in top condition, I’d love to hear from you. Please leave a comment so everyone can benefit.
Thanks for visiting!
Robert  Seth is a CPA in the Clark County, Washington area who has been serving individual and small business clients for the last 25 years. His business includes a growing number of remotely serviced customers throughout the United States. He’s also a writer and technology expert. He has a passion for improving the lives of others by helping them simplify the complicated stuff in their lives.